Table of Contents
Requirements
Execution
- Git
- cmake (newer than 3.9)
- C++ 17 compiler
- OpenMP 5.0 and above (optional)
Development
- Doxygen and Graphviz (optional, for building documents)
Dependencies
Development
Command Line Execution
- Note
- It's easier to do it in the VS code as shown later, but it's better to do it in command line for your understanding.
Build
- You don't have to make
builddirectory (mkdir build) and move to the directory (cd build), thanks to the-B buildoption. Thebuilddirectory will be automatically generated if you don't have one.
Execution
Windows
- Create output directory if not exist New-Item -ItemType Directory -Path result/dambreak -Force
- Remove old output files if exist Remove-Item -Path $outputDir/* -Force -Recurse
- Run simulation ./build/mps.exe --setting input/dambreak/settings.yml --output result/dambreak 2> result/dambreak/error.log | Tee-Object -FilePath "result/dambreak/console.log"
Linux
- Create output directory if not exist mkdir -p result/dambreak/
- Remove old output files if exist rm -rf result/dambreak/*
- Run simulation ./build/mps --setting input/dambreak/settings.yml --output result/dambreak 2> result/dambreak/error.log | tee result/dambreak/console.log
Note
(1). Execution Command
The execution command consists of three parts.
- Execute with required options ./build/mps.exe --setting input/dambreak/settings.yml --output result/dambreak
--settingor-sspecifies the setting file.--outputor-ospecifies the output directory.
- Change standard error output to the specified file. 2> result/dambreak/error.log
- Save the console output to the specified file. Tee-Object -Filepath "result/dambreak/console.log"
(2). Standard (Error) Output
The output of a c++ program includes standard output and standard error output. The standard output comes from std::cout or printf(), while the standard error output comes from std::cerr or fprintf(stderr, ). By default, both the standard output and the standard error output will be shown in the console. Changing the output destination is called "redirect", and can be accomplished with the > command.
For example, the standard output of the command below will be written to result.log. The standard error output will be shown in the console as usual.
In the next example, the standard output will be written to result.log, and the standard error output will be written to error.log.
(2). tee command
tee command allows us to show the standard output in the console and save them into a file at the same time.
it sends the output of a command in two directions (like the letter T)
Foe example, the standard output of the command below will be shown in the console and will be written to result.log at the same time.
Scripts
Script files are prepared in the scripts folder. You can just call it for execution.
Windows
Linux/Mac
VS Code Execution
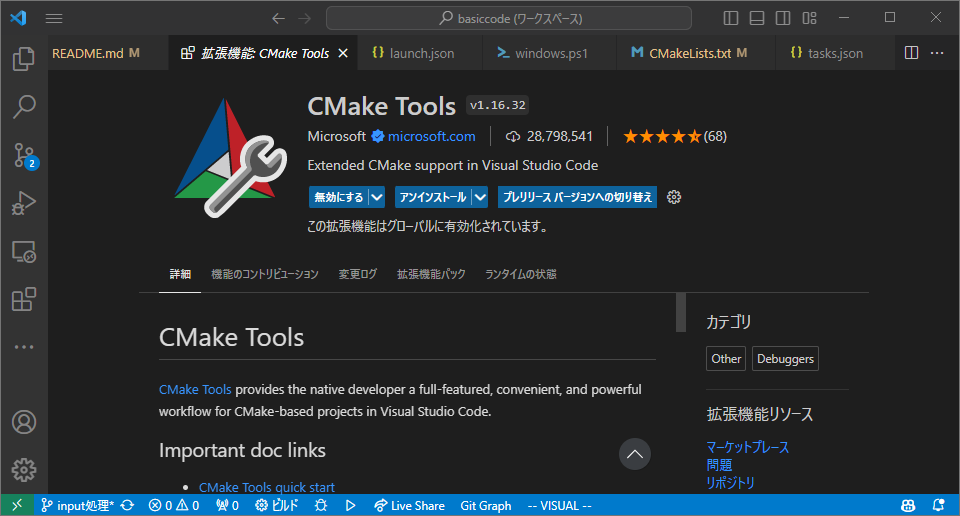
- Before you begin, install CMake Tools extension.

Build
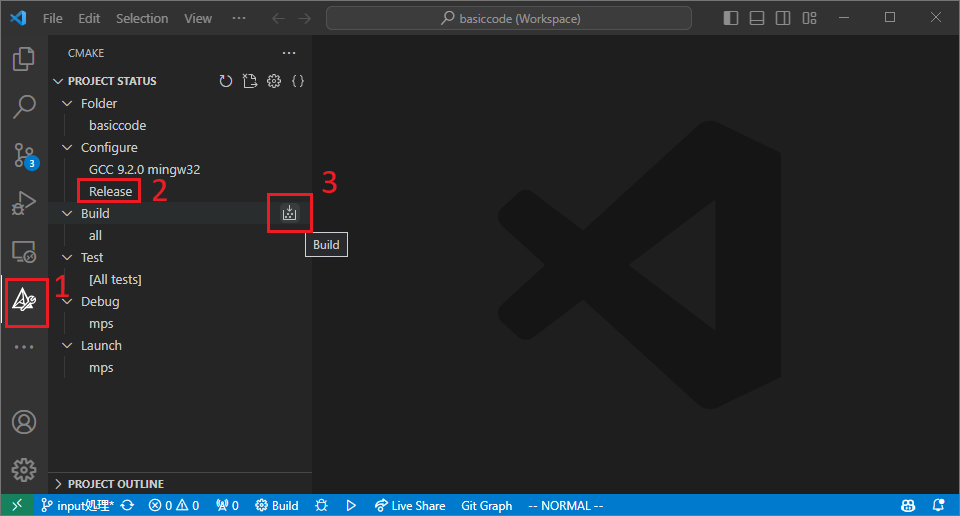
- Open Cmake tab.
- Change
ConfiguretoRelease - Execute
Build

Execution
- Execute in the same way as the command line.
- Don't use the
Launchbutton on the CMake tab. It will launch the program in a wrong directory, and it won't delete existing files.
Note
- You can configure
tasksto do it easily.
- Create
.vscode/tasks.jsonfile.

- An example for Windows: {"tasks": [{"label": "Execute","type": "shell","command": "./scripts/runner.ps1","options": {"cwd": "${workspaceFolder}"},"group": {"kind": "test","isDefault": true}},],"version": "2.0.0"}
- Open Command Palette (
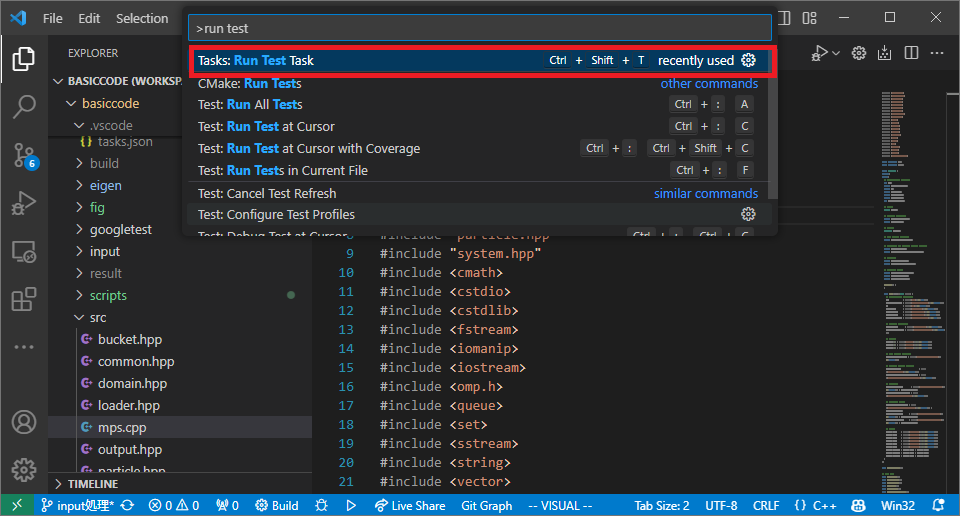
Ctrl + Shift + PorF1). Search and executeTasks: Run Test Task. It does the same thing as calling the script in the terminal.

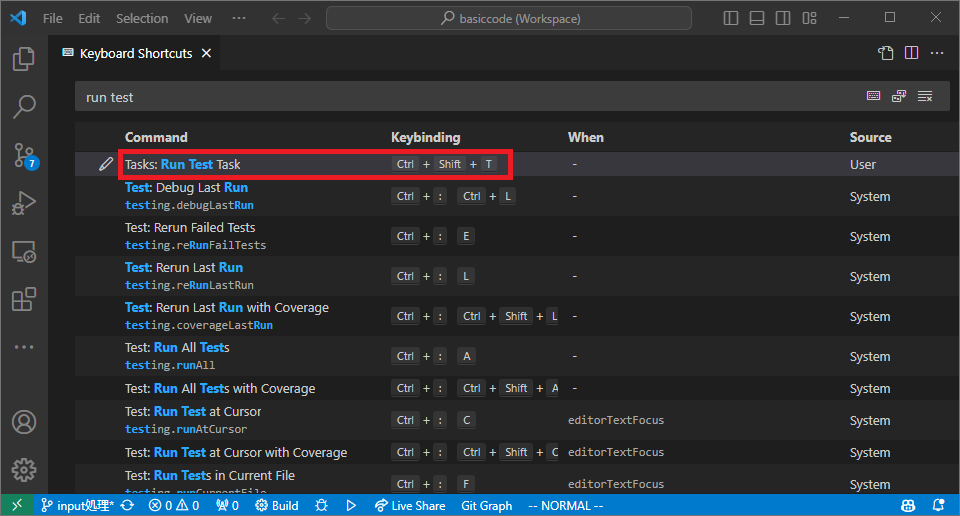
- You can set a keyboard shortcut to run test task. To do so, open Command Palette and move on to
Preferences: Keyboard Shortcuts. SearchTasks: Run Test Taskand set any keybinding you want.Ctrl + Shift + Tis a suggestion of the writer.

Checking Results
Result files will be written in result/dambreak/vtu/***.vtu. Open these files in ParaView to see the result.
Debugging
- Open Cmake tab.
- Change
ConfiguretoDebug - Execute
Debug

- Unlike the
launchbutton in the previous section, thedebugbutton will execute the code in the correct directory. Also, there is no need to delete existing files when debugging. So you can just press it this time.